A common issue that car owners face is that over time, the clear plastic lenses over the headlights can become foggy or cloudy, which degrades your night visibility. The fogginess generally comes from a combination of sunlight damage and built-up grime. Many owners of older cars know that when the headlights get foggy, that can be a problem. The vehicle can become dangerous to drive at night, or may not pass important inspections that allow it to be used for a driving test or even to allow it to stay in the road.

An example of a cloudy headlight lens in need of some TLC.
Luckily instead of having to buy a whole new headlight assembly or lens there are a few tricks to clearing off the head lights making them usable again. Some of the methods are better than others.
Headlight Restoration DIY Solutions:
Headlight Cleaning Kit :
One of the most common ways is to buy a headlight restoration kit. These vary in quality and price. The cheapest ones can be around $15. Some of the more expensive professional kinds can cost as much as $150.
Pros: Affordable, and probably the most effective cleaning method you can do at home.
Cons: Takes time – an hour or more. Better suited for someone more experienced with working with tools and DIY projects, as you have to be careful not to damage the lens when sanding or buffing. Also, the headlight will begin clouding up again in a matter of months. The above example headlight was thoroughly cleaned with a cleaning kit 14 months ago.
Vinegar :
When using vinegar to clear off headlights, fill a large bucket full of vinegar. Remove the plastic headlight cover from the car and dip it into the bucket. Make sure that it is enough vinegar to cover the whole headlight as that will save time. The headlight should be left in the vinegar for at least an hour. I have never cleaned a headlight with this method so I cannot attest to the effectiveness.
Pros: Affordable.
Cons: Labor intensive in some cases due to the fact that the headlight assembly has to be removed from the vehicle.
Sandpaper :
Unless the sandpaper is part of a packaged cleaning kit, I do not recommend this method. The chance for permanent damage to the headlight lens is high if you use an overly course grit rating. If you’re determined, you will use sand paper to scrub off the film. Only apply as much pressure as absolutely necessary. There is no point in removing a film only to have the headlight be scratched and damaged.
Pros: None.
Cons: Very high chance of damage to the headlight lens.
Polish :
This is another method that is often used. Plastic or metal polish can be used. The polish will work best if the headlights are cloudy from being scratched and not when they are cloudy from grime. Make sure to read the recommendations on the bottle, as some polishes will leave a thick layer over the lens. This layer can attract even more dirt and grime, or at the least obscure the lens thus negating any benefit.
The Insect Repellant Method :
Using insect repellant to clear up cloudy lenses is one of the most popular DIY methods.
Pros: Easy to do. Quick. Cost effective.
Cons: Only lasts a few months.

This is an example of a cloudy headlight lens prior to being cleaned with insect repellant.

After cleaning. This project took me 10 minutes to clean both lenses.
How to Clean Headlight Lenses with Insect Repellant:
Step 1
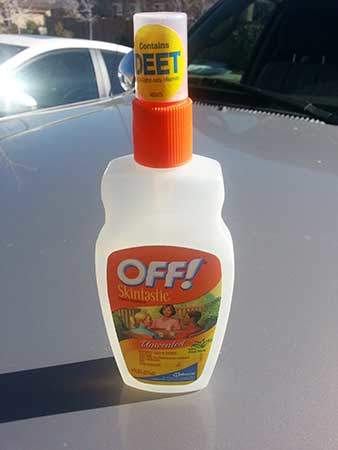
Get some bug spray that contains DEET. This can be bought at almost any store. I happen to have had this bottle in the garage for a few years.
Step 2

Spray the insect repellant on a dry paper towel or a cloth rag.
Step 3

Wipe the repellant on the lens until the lens becomes clear. How hard you need to scrub depends on the severity of the cloudiness. In this example, I was able to clean it up with little hard scrubbing and in just a few minutes.
Step 4

The final step is simply to wipe any remaining repellant off the lens with a clean damp paper towel or cloth.
Warning: DO NOT spray the insect repellant directly on the headlight lens. Make sure you spray it on your cloth and wipe. In some cases, insect repellants can damage your paint. Years ago, I sprayed OFF repellant on a vehicle to remove some ants that had found food inside of an equipment bin. The insect repellant made the paint bubble and ate it right off of the vehicle. True story.
This method will clean the headlight and make it pretty clear – though not “like new” as a professional cleaning will get you. However, while this is great for clearing up the headlight if there is an inspection soon, it is not a good long term solution. Your lenses will still cloud up after several months.
The BEST Solution – Have a Professional Do It
While the methods above may work fine for a DIY project, they are not optimum solutions. The reason why is that your lenses will generally cloud or fog back up in a matter of months.
The difference between the DIY methods and a Professional job is that there is a special type of protective coating that should be applied after cleaning. This coating is relatively expensive, and generally only available to those in the automotive industry. It is not included in most kits (and if it is, those kits can cost over $100).
A professional can make your headlight lenses look factory new (provided you don’t have any extensive existing damage to them already). Prescott Import Car Service offers a high quality headlight cleaning service that will polish your lenses to look like new. The coating makes a difference, and your lenses will remain clear for up to two years, and longer in many cases. There is a difference in what we do compared to DIY methods.
Click here to receive a consultation or make an appointment today!
We look forward to serving you.